I haven't been very disciplined in updating my blog. Sometimes life is too busy and hectic to stop and write about it! :)
I have been working on each room in my house trying to accomplish the little tasks and incomplete jobs left from when we built the house. So many rooms don't have anything hanging on the walls or curtains. So by going room by room, I'm trying to remake/remodel the whole house. I started in the breakfast area. One of the items on my lists to redo was the kitchen table.
I got the idea for making over my kitchen table from one of the blogs I follow: Saving4Six. She re-did her kitchen table, and I loved the way it turned out. She painted her chairs and benches all black which I considered doing, but fortunately I found some chairs that didin't require painting.
Here is what my kitchen table looked like in the beginning of this process.

And the side view:

I had only 3 chairs remaining for the table. The other 3 chairs had fallen apart over time. I have actually had this table set since approximately 1993. It held up well until I had the Ferrell boys. :)
The boys helped me move the table out to the garage. I didn't think it would take me longer than a week to redo the table. I was wrong.
I started out by sanding the table top with a hand sander.

I worked on it every day for about an hour and then I would take a break. Sometimes the break would be for a couple of days because my arms would be so tired. Who would think using a hand sander would still make your arms so tired?!
I was determined to get the top evenly sanded. It was harder to do than I had thought. You can see the uneven color in this picture. Some of the stain was harder to sand off than other parts of the table.

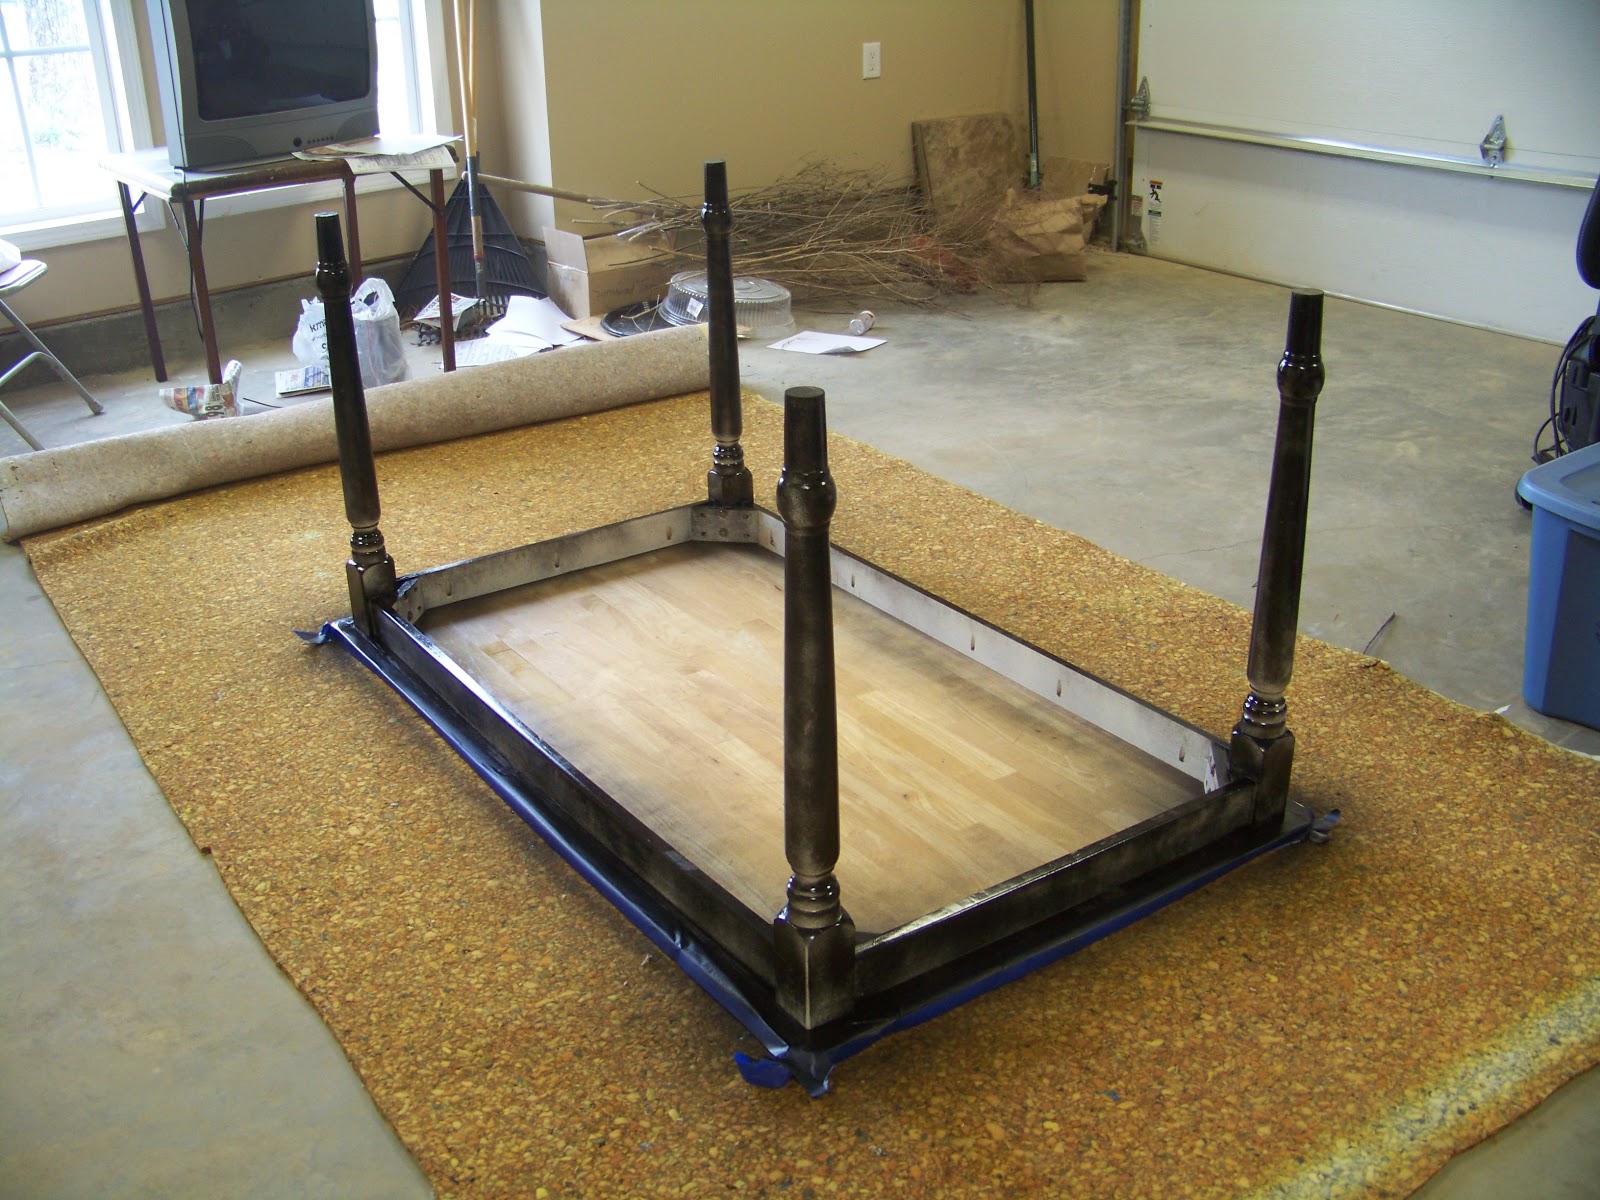
After sanding the top down evenly, Dave helped me turn the table upside down on some foam (to keep the top from getting scratched) so I could spray paint the table legs black using enamel spray paint.

I taped the edges of the table top with painter's tape to keep the black spray paint from getting on my table top. I started off spraying the legs with a light coating of the black spray paint. I didn't want it to run.
Another coat:

Another coat:

Before staining the top, I wanted to purchase the chairs to go with the table. I wanted to make sure the table and chairs would match. I found these lovely chairs and bench at Walmart. :)

Sweet Dave put them together for me.

Once the table legs were finished and completely dry, Dave helped me flip the table back over onto its feet. You can see that I finally got the top evenly sanded. It took several hours and days and weeks, but it was worth it.

I bought some polyurethane and stain mixed together. I had never used that product before, but I was pleased with how it worked on the table.

The staining process took several days too. After every coat of the stain/polyurethane mixture, I would let it "cure" for 24 hours and then I would lightly sand the top again. After dusting/cleaning the top of the table, I would apply another coat of the stain/polyurethane. I didn't keep up with the number of coats I put on the table top, but I know it was at least 5 coats. The color of the stain I used was Pecan. I wanted the top to match the seats of my chairs. Here is a picture of the table with 2 or 3 coats of the stain:

While I was working on my table, the boys and I enjoyed our meals in the kitchen on a makeshift table.

I finally finished the table just in time for Shane's birthday party. I think it turned out great!

Dave was the one who was really impressed. When I started this process, he tried to talk me into buying a new table and chair set for the breakfast area, but I want to save my money for new furniture in the living room. Once I was finished with the table, Dave complimented my efforts by saying it looked like a brand new table set.


I bought 4 chairs and one bench. The bench works perfectly in front of the window where there isn't a lot of space for moving chairs.

I love the way the table and chairs look together and it all fits perfectly in the space.
I'm almost finished with my breakfast area makeover. It's taken me 4 months! Ha! I'm setting next Monday as my goal to be finally finished with this makeover so I can move over to the living room!
Check back next Monday for more Makeover
the Ferrell boys and me!
I'm linking up to these awesome parties!

Oh my gosh! This looks so good and not at all what I thought you were doing but I love it! Good job DIY Tina!!
ReplyDeleteLove the black enamel coat for the legs and base. And it’s great that you went with a stain for the top part; it makes it look like the base and top are separate pieces to begin with. The bench is a nice touch, btw. :)
ReplyDeleteRyann @ Yancey
What a great transformation!! It looks fabulous in your kitchen space now- the black really looks sharp. Thanks for sharing this awesome project at the Get Your DIY On Challenge: Furniture Transformations. We hope you can make it back this evening at 7pm EST to share a holiday sign project - or just come by to get some holiday inspiration!
ReplyDelete~Krista from the happy housie
I have this exact table and was considering buying a new one because of it being in such bad shape. I went online to see if there was anything I could do to salvage it. I found this! I'm so excited to try this! Thanks for sharing!
ReplyDelete