Pages

Friday, March 21, 2014

Five Minute Friday: Joy

IF you follow my blog, then you know that I love to link up to different other blogs and participate in the blogging community.  

I've stumbled across an interesting group of bloggers that write about one random word for five minutes every Friday.  Lisa-Jo Baker selects a word and posts it on her blog, lisajobaker.com.
and bloggers link up to share their 5 minutes thoughts on the chosen word.

From Lisa-Jo:
On Friday’s we silence the inner critic. The loudest of all naysayers. And on Fridays we remind ourselves that The Word is for us and loves us and welcomes us.
Your words are safe here.
So come and write with us. Together. On one word for five minutes. Here are all the details. And then link up your post or leave it in the comments. But remember, the one must rule here is that you visit the person who linked up before you and encourage them in their writing.
That’s it. The gift of encouragement – pass it on.
Today the word is the one that’s bubble up and out and spilled over in me today.
Today the writing prompt is JOY.

So here I go . . .
JOY:


What is Joy to me?  It's walking outside on a sunny Spring day and being greeted by my 7 spirited dogs. They bring instant Joy to my soul.

Joy is watching Alex doing flips on the trampoline over and over and asking me to stay and watch him do the flips.

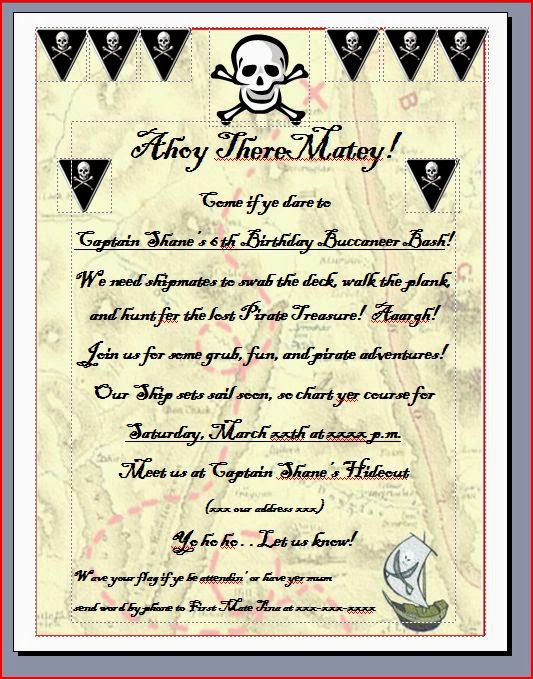
Joy is the pleasure I get in watching Alex and Shane pretend to be pirates with the stick on mustaches that I've rigged into goatee beards on their faces.

Joy is the assurance and confidence I see in Zach as he tells me about his day and about the talent show practice where he has a special part although it's a small part .... but there are no small parts when it's your child.

Joy is watching Dave spend his Friday night building a pirate ship out of cardboard boxes to make his pirate-crazed wife happy knowing it's really because he loves me.

Basically my life filled with little boys, dogs, and my love- Dave - is my Joy.

And that is the Five Minute Friday with 

                         the Ferrell boys and me!


Five on Friday - March 21, 2014


I'm linking up with some other blogs to share
Five on Friday with the Ferrell boys and me!


[one]

Pirate Party Overload

I've been planning Shane's birthday party . . . and I may have gotten a little out of hand!  One of my friends suggested I might need a pinterest intervention!  :D


[two]

Shane

My sweet baby is on the verge of being six years old.  This makes me sad for some reason.


So I'm going to enjoy this little boy while he's still little cause he won't be little for long.  


[three]

Sinus crud

Enough said.  No pictures please!

[four]

Pirate Fun - Out of Control

Because we've been crafting and planning Shane's Pirate Party all week, everyone's gotten a little obsessed with pirates. 


[five]

World Down Syndrome Day

Mismatched socks worn in support this Friday.  :)


So there's my Five on Friday!  Hope you've enjoyed this quick look into this very busy past week with . . .

                          the Ferrell boys and me!


Thursday, March 20, 2014

Pirate Party Invitations - - You Aaargh Invited!


If you take the time to search the internet and pinterest, you can find lots of free birthday invitations for just about any birthday party theme.

I found some very cute and free invitations for a Pirate Party on my search of the internet, but when I saw the message in a bottle invitation, I knew that's what I wanted to do for Shane's party.

I used my Microsoft Publisher program to make the invitations.  I found a faded out treasure map to use as the background of the invitations.  I also found several invitations on the internet using fun Pirate language in the invite and picked through the ones I found until I came up with a Pirate invitation that I liked.

I used the Blackadder ITC font for the invitations.  It really looks like a Pirate script.  I added some skull and bones clip art.   Here's what it looked like before I printed it.


I printed out the invitations on plain white copy paper.  I ripped the sides of the paper to give the invitation a rough, jagged edging.

I used a black ink pad from my scrapbooking supplies to darken the edges of the invitation and make it look aged.


I could have burned the edges with matches, but I thought using the black ink would be safer for me.  


I used a pencil as a guide for rolling the invitations up into slender tubes and tied them with jute twine.


Most of the message in a bottle invitations use glass bottles, but I didn't want to use glass bottles with 6 year olds.  I've been saving my plastic water bottles for this purpose.


Shane helped me put together his invitations.  First we used a funnel to put some sand in the bottles. . . certainly real messages in bottles have some sand in them . . .


It required some serious concentration.


Besides the sand, we also added some slivers of pirate gold a/k/a glitter to the bottles.


We figured a hint of gold would entice our friends to the party. 


Then we added the invitation to the bottle.


Aaargh Matey!  


Shane had a great time putting these invitations together for his friends.  My only suggestion - Make sure the sand is completely dry otherwise the invitations will be damp and the ink will fade where it gets wet.  Don't ask me how I know this.  :)  


The next step involved a little oven action.  Shane and I gathered up some of his broken and unloved crayons.  We peeled the paper off and put them in a silicone baking dish.


We set the oven for 200 degrees and let the crayons melt slowly in the oven.


We dipped the tops of the bottles into the melted crayon . . .


Then we used an initial embossing stamp to put the letter "F" in the melted crayon.  I had help from Captain America in completing this step.  :)


The tops turned out really cute.  Blue for boys . . .


Pink for girls . . .


I made some labels using Microsoft Publisher to put on the outside of the bottles . . . 


and some skull tags to tie around the tops along with a little burlap flourish.  :)


The end result of all of mine and Shane's hard work made me happy.


And although the invitations cost me a lot of time, they didn't cost me any money to make.  


I used all materials that I already had on hand . . . and I got to spend some quality time with my favorite pirate of all.

The invitations are done so now I'm committed to the party.  I just hope that once the party is over, I won't have to be committed!  

So much to do before the big day!  And lots of pirate adventures are still waiting for . . .

                           the Ferrell boys and me!


I'll be linking up to some awesome Blogging Parties!  
Check out Serenity Now:  Weekend Bloggy Reading for more great ideas!


Wednesday, March 19, 2014

Skull and Bones Wreath - Part 2


The best part about having a Pirate themed birthday party is how easy it's going to be finding decorations to set a pirate mood.

I have about 4 or 5 containers of Halloween decorations in my storage shed with lots of skulls and crossbones to use for the pirate decorations.

The first item I retrieved from the storage shed was the skull and crossbones wreath I made for last year's Halloween door hanger.


You can read about how I made this wreath in my earlier post Skull and Bones Wreath.  

I wanted to make the wreath a little more like a pirate wreath so I found a pirate hat printable on the internet to print and also added a patch to cover one of the eye sockets.


I thought a Pirate greeting was also necessary to "warn" our party guests before entering the "hideout".  :)

I took a piece of cardboard and quickly painted a Pirate greeting that seemed fitting for a Ferrell boy pirate party.


When I was finished and showed it to Shane a/k/a the birthday boy, his whole face lit up.  He thought it was awesome!  What do you think?


Step by step . . . I'm checking off the items on my to-do list for Shane's pirate birthday party.

Next on the list . . . birthday invitations . . . and I have a great idea for those!

Until then . . . more pirate adventures await . . . 

                             the Ferrell boys and me!

Monday, March 17, 2014

Pirate Party Loot Bags

Shane's 6th birthday is coming up at the end of March, and the boys and I decided on a pirate theme for his party.  Aaargh!

I've been busy posting ideas on my PirateParty Pinterest board . . . everything and anything pirate.  


The main agenda of any good pirate is acquiring pirate "booty" or as defined in the dictionary:  pirate treasure, plunder or other ill-gotten gains.  :)

So I decided to make some little black bags for the children to accumulate their "booty" in during the party.  ( I love saying booty . . . I don't know why! )  I had some black material in my material stash that I used to make the bags.  I simply folded over some of the material, cut it the width and height I wanted each bag, and stitched up the sides to make the bags.


I may or may not finish off the top of the bags.  In some ways I think leaving the top edges rough adds to the pirate effect.  I'll probably use my pinking shears to finish the edges.

Next I wanted to stamp a skull and crossbones on the front of the pirate bags.  I decided to make a stamp using a potato.  I didn't have a small circular cookie cutter so I used a apple-shaped cutter from this Pampered Chef set.


I sliced the potato in half.  I used the apple-shaped cutter and pushed it into the surface of the cut potato until it was pushed in about 1/4 inch into the potato.  Then I used a small knife and cut around the potato using the metal of the cutter as a gauge of how deep to cut.  Below is the potato with the cutter pushed into the potato with the cut-away part laying beside it.


Once I removed the cutter from the potato, you can see the apple cut-out on the potato surface.


I then used the knife to cut away the apple design carefully to make a skull shape.


I used a paper towel to dry the cut potato stamp, and then I dipped it into some white acrylic paint.


Then I stamped the skull impression onto the lower part of the black booty bags.


I used the other potato half to cut away some of the potato to make the cross bones image to stamp under the skull.


It wasn't as easy to free-hand that design and I was worried about how it was going to look.  It looked okay once I stamped the bags with it.


I ended up just painting the crossbones by hand instead of using the stamp.  It looked just a good as the stamped image and seemed to be quicker.


I made a gazillion of these pirate booty bags.  I got a little carried away.  I had all the materials I used to make the pirate booty bags on hand so I didn't have to go out and buy anything . . . which is always a good thing.  


I made these very quickly on Saturday.  It took about 30 minutes to sew up the bags and stamp them . . . which was a good thing cause I wasn't feeling too spiffy this weekend.  Sinus crud has invaded my head.  :/

But I couldn't let the weekend get by without doing something productive toward Shane's birthday party.  

After all it's only a couple of weeks away, and I've got lots I want to do to make sure it's saturated with plenty of pirate adventures for Shane's friends and also for . . .

                            the Ferrell boys and me!

I'll be linking up to some awesome blog parties!  Check out Serenity Now:  Weekend Bloggy Reading for some great ideas.